Remember: washing is not disinfecting. One clears the mess; the other keeps your clients safe. Here is how to sterilize your Nail Machine Drill and bits without damaging your investment.
I. Disinfection of Drill Bits
Your bits are high-risk contact tools. They require a strict liquid disinfection process to remain safe for reuse.
1. Pre-Disinfection Cleaning
If the surface is covered in gel residue or dead skin, the disinfectant cannot reach the actual surface of the bit. You must remove visible debris first.
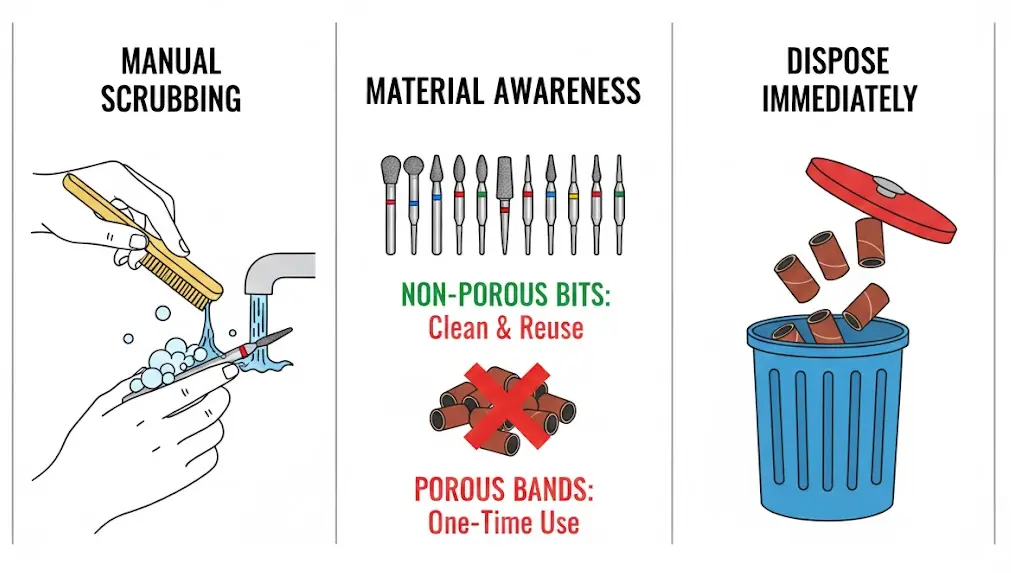
- Manual Scrubbing: Use a dedicated brush to scrub each bit under warm, soapy water. We recommend a brass brush for tough tungsten carbide bits—the metal bristles are strong enough to dig into the deep flutes of the bit. For delicate ceramic or diamond bits, a firm nylon brush is better to avoid scratching the surface.
- The "Auto-Clean" Hack: A pro tip is to insert the bit into your handpiece and run it at a very low RPM against a stationary cleaning brush. It’s faster and ensures every angle of the flute is cleared.
- Material Awareness: * Non-porous materials: Tungsten carbide, ceramic, and diamond bits are built for longevity. They can be disinfected and reused hundreds of times.
- Porous materials: Sanding bands are paper-based. They absorb fluids and bacteria. These are strictly one-time use. Toss them in the bin immediately after the service.
2. Chemical Immersion
Once the bits are physically clean, they are ready for the chemical bath. This is where the actual disinfection happens.
- Reagent Choice: Use an EPA-certified hospital-grade disinfectant like Barbicide or Lucas-Cide. If you are using a concentrate, pay attention to the color. For Lucas-Cide, the solution should be a consistent pale pink. If it’s dark pink, it’s too concentrated and may damage your tools.
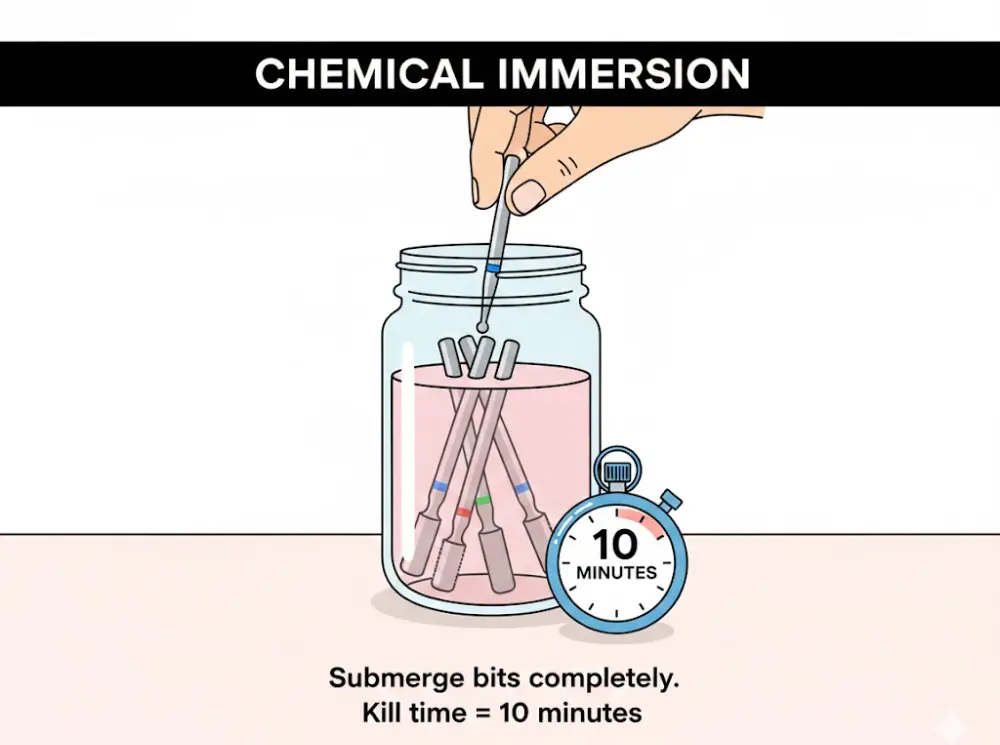
- The 10-Minute Rule: Submerge the bits completely in a glass jar or a designated soaking tray. They must stay immersed for exactly 10 minutes. This is the required "kill time" for most bloodborne pathogens and fungi.
- The Danger of Over-Soaking: Do not leave your bits in the solution overnight. Over-exposure to chemicals causes the metal to oxidize. You’ll notice a dull, greyish tint or orange rust spots. Once a bit is rusted, its structural integrity is compromised, and it must be discarded.
3. Rinsing & Sterile Storage

- The Final Rinse: Use clean, running water to wash away every trace of the disinfectant. Residual chemicals can cause skin irritation for your next client or lead to bit corrosion over time.
- The Drying Phase: Lay the bits out on a clean, lint-free paper towel. Avoid regular towels as they can harbor moisture and bacteria. Ensure they are bone-dry before storing.
- Safe Storage: Store your dry bits in a UV sterilization box or a sealed, dust-free container. A clean bit kept in a dusty drawer is no longer a clean bit.
II. Machine/Handpiece Disinfection
Your Nail Machine Drill is a precision instrument. It contains a high-speed motor and delicate bearings that cannot get wet. The goal here is surface decontamination.
1. Handpiece Surface Decontamination
The handpiece is the most handled part of your kit. It’s a primary vector for cross-contamination.
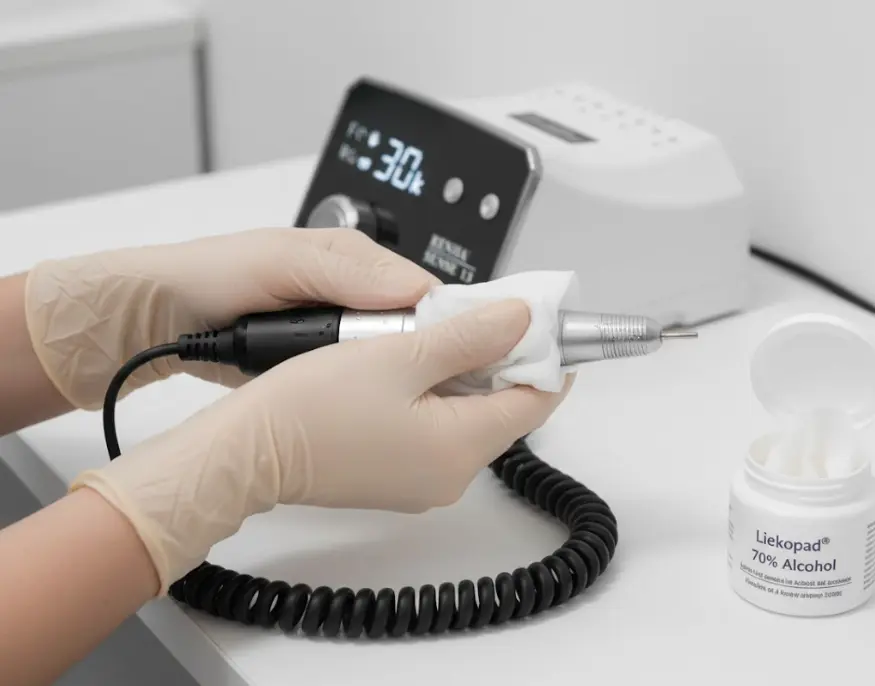
- The "Wipe, Don't Spray" Rule: Never spray disinfectant directly onto the handpiece. The mist can settle into the motor vents or the chuck opening, causing internal rust or a short circuit.
- Effective Wiping: Use a 70%-75% alcohol wipe or a cloth dampened with disinfectant. Wipe the entire body, from where you grip it down to the tail where the cord connects.
- Dwell Time: For the disinfectant to work, the surface must stay visibly wet for at least 30 to 60 seconds. If it dries instantly, wipe it again. This "dwell time" is what actually neutralizes viruses on the plastic or metal casing.
2. The Control Box & High-Touch Zones
The base of your Nail Machine Drill is often overlooked, but it’s touched constantly by gloved hands that have just finished filing.
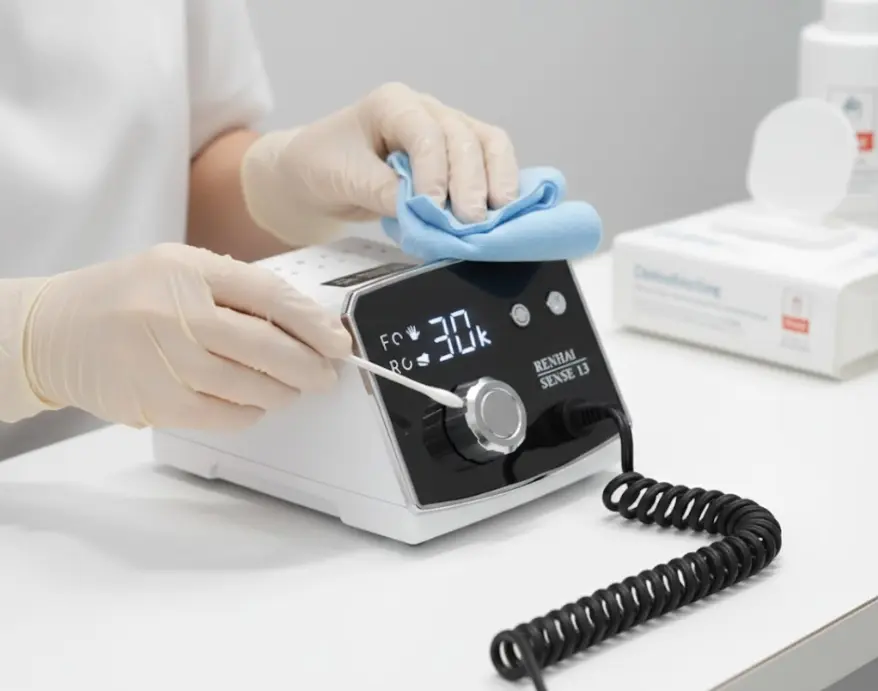
- Knobs and Switches: Pay special attention to the speed control knob and the forward/reverse switch. These crevices are magnets for fine dust and germs. Use a pre-moistened swab to get into the grooves around the dials.
- Cords and Cables: Dust travels down the cord. Wipe the first 12 inches of the handpiece cable, as this often brushes against the client’s hand or your work table during the service.
III. Common Disinfection Mistakes to Avoid
Even experienced techs make mistakes. Avoid these common pitfalls:
- Mistake 1: Alcohol spray = disinfection. Sprays evaporate too quickly. The contact time is usually too short to kill resilient fungi. Soaking or wet wiping is the professional standard.
- Mistake 2: Neglecting the inside of the chuck. Dust accumulates inside the handpiece connector. Use a cotton swab lightly dampened with alcohol to clean the inner walls of the opening. It keeps the connection clean and prevents the "bit slip" caused by debris buildup.
- Mistake 3: Disinfecting all bits together. If one bit shows signs of rust, keep it away from your good bits. Rust is contagious in a chemical bath. Discard rusted bits immediately to save the rest of your kit.
- Mistake 4: Skipping the "Blank Mandrel." Always store your handpiece with a "blank" bit or the factory-provided protector pin inside. This maintains the tension of the internal spring clips while the machine is off.
- Mistake 5: Using 99% Alcohol. 99% alcohol flashes off too fast. 70% alcohol contains enough water to slow down evaporation, allowing it to penetrate and destroy the cell walls of bacteria effectively.
Summary
To wrap up, proper sanitation isn't a single step—it’s a ritual. By mastering the three-stage sterilization of your bits and the surface decontamination of your handpiece, you ensure your equipment stays as professional as your artistry.
Remember the core takeaways: always wash before you soak, respect the 10-minute kill time, and never let a spray bottle get near your handpiece's internal motor. These simple habits prevent rust, protect your investment, and, most importantly, keep your clients safe from cross-contamination.
Ready to professionalize your setup? Shop our high-performance Nail Machine Drills at RHJC today! Or, if you’re still refining your process, save this guide to ensure your disinfection routine is always up to the mark. Is your current routine truly enough to keep your nails safe?